This post provides step-by-step instructions to paper authors, lightning talk speakers and guests to properly set up desktop and audio capture using OBS Studio, an open-source recording and streaming solution available on Linux, macOS and Windows.
Please match these guidelines to the best you can, as the settings below allow us to further process your recordings without losing quality with later stitching and re-encoding.
Lightning talks which do not follow these guidelines (especially output resolution, format and bitrate), will be discarded as processing those will require far more time than their length.
This tutorial will make you go through 5 major steps, which should take about 5 minutes to complete:
- Configure canvas / output resolution and framerate, video and audio encoding settings
- Set up audio capture
- Set up desktop capture
- Optional: set up webcam capture
- Optional: adjust audio capture for noise filtering
Talk guidelines and tips are provided at the end.
Prerequisites
- CPU-wise, a moderately-recent one will be enough. A 4th-generation Intel i5 at 2 Ghz (2013/2014) will perform decently. No GPU is required, as we advise against hardware encoders (Nvidia NVENC, Apple VT H264, Intel QSV, AMD AMF).
- 2 GB of free disk space. The settings below will most likely lead to a 1.4 GB recording for a 30-minute talk.
- A dedicated microphone, possibly from mobile headphones, will generally provide better audio quality than your laptop’s integrated microphone.
- Optionally, you may also be able to forward your mobile phone audio input over bluetooth or using some dedicated app, which will generally provide better ambiant noise cancellation.
- Preferably, you should have your desktop resolution set to a 16/9 aspect ratio and not 16/10 or 5/4. 1920x1080 is such a resolution. Some laptops have a 1920x1200 native display, which is a 16/10 ratio. Even if your laptop display looks slightly stretched by the altered resolution, the recording will have the correct ratio. This helps prevent the use of black bars around your recording area, as you will later scale your desktop to the recording canvas.
Of course, you need to download and install OBS Studio. Once you have plugged your microphone and installed OBS Studio, launch it and you should find yourself in front of the window below:
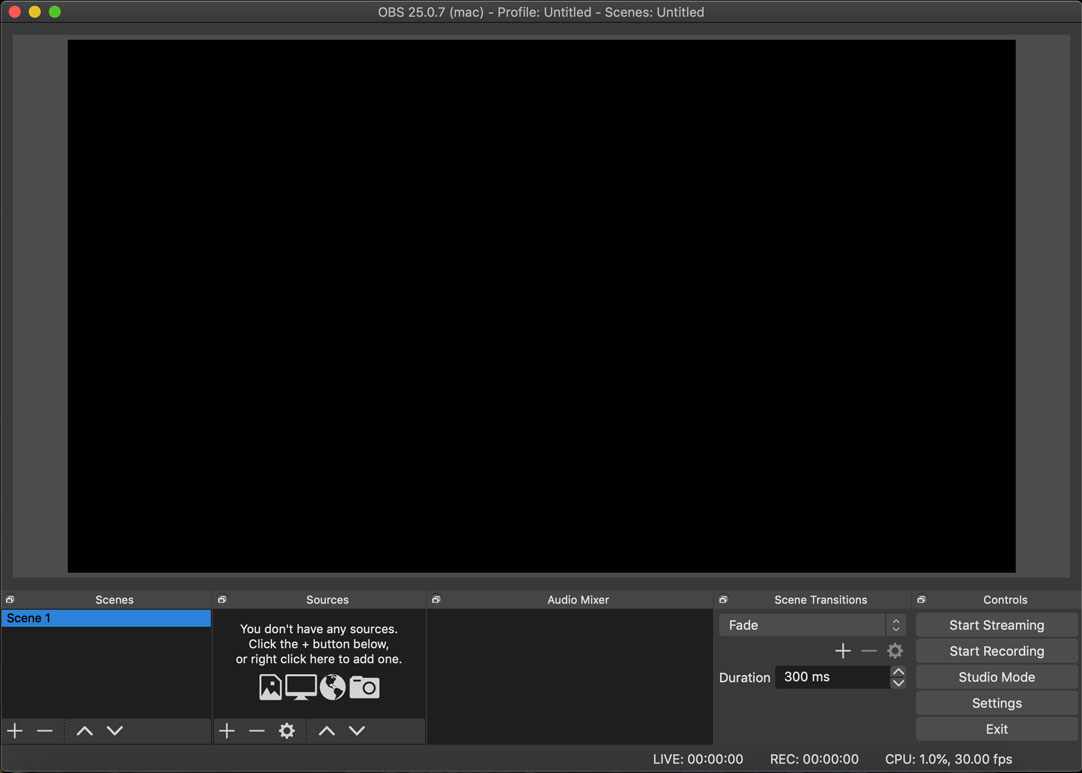
OBS main window (pleine taille)
The main area will preview the actual output of the recording. It can be disabled if you have performance issues during recording (right-click on it).
Below the preview area are 5 dockable sections:
- Scenes: we will only use a single scene. If there isn’t one already, create it by clicking the «+» button.
- Sources: we will set up audio, desktop and webcam capture using this section.
- Audio Mixer: provides a VU meter to watch for audio clipping, input volume control and advanced audio filter.
- Scene Transitions: we will not use scene transitions.
- Controls: start and stop recordings by clicking the corresponding button. Do not use Studio Mode, which is only useful when using multiple scenes (and requires a lot more processing power).
Changes to the settings, scenes, sources and their layout is automatically saved. You may close and relaunch OBS and will find them restored right away.
If you have two preview areas, with a transition button in between, you are in studio mode. Please disable studio mode by toggling the button at the bottom-right.
You are now ready to proceed with the recording set up.
If multiple speakers must talk:
- Preferably, have each speaker record his or her segment alone with OBS Studio, and send us all of your recorded segments, appropriately numbered.
- If that is not possible, you will need to setup screen sharing and audio conference between all speakers (and you are on your own).
- Please do not capture slides from a screen sharing app as video quality will degrade significantly. Rather have the speaker who runs OBS Studio go through the slides for the others.
Canvas and encoding settings
First, we need to make sure the output resolution and encoder settings match those required for our live-streaming.
Click the «Settings» button and go to the video section.
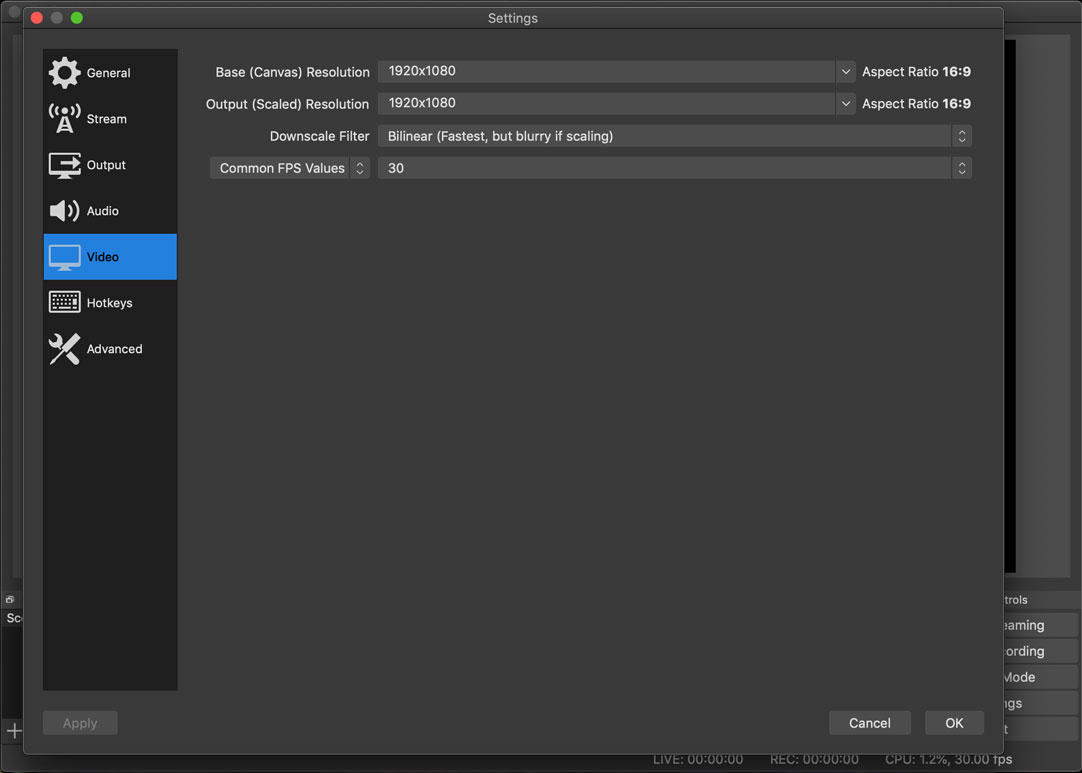
OBS video / canvas settings (pleine taille)
Set the following values:
- Base (Canvas) Resolution: 1920x1080 (ALWAYS use this value, even if your desktop has a different resolution)
- Output (Scaled) Resolution: 1920x1080 (ALWAYS use this value, even if your desktop has a different resolution)
- Downscale Filter: Bilinear
- FPS: 30
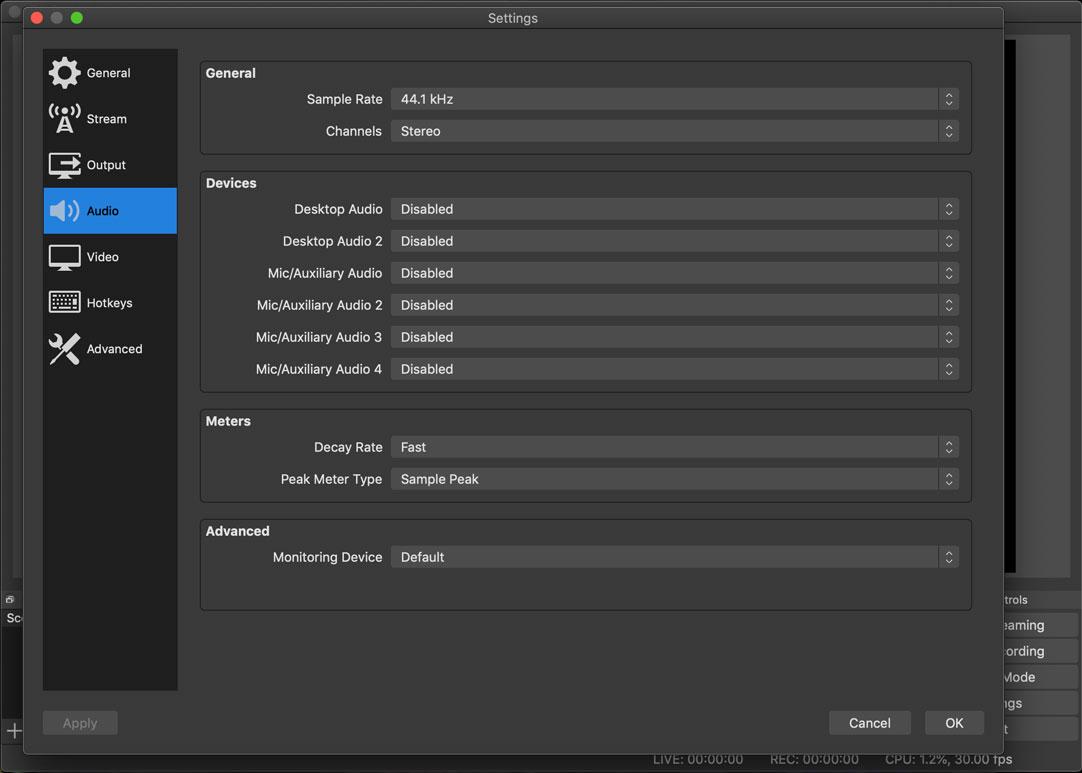
OBS audio settings (pleine taille)
Now go to the audio section (see above). Set the sample rate to 44.1 kHz and stereo channels in the general section.
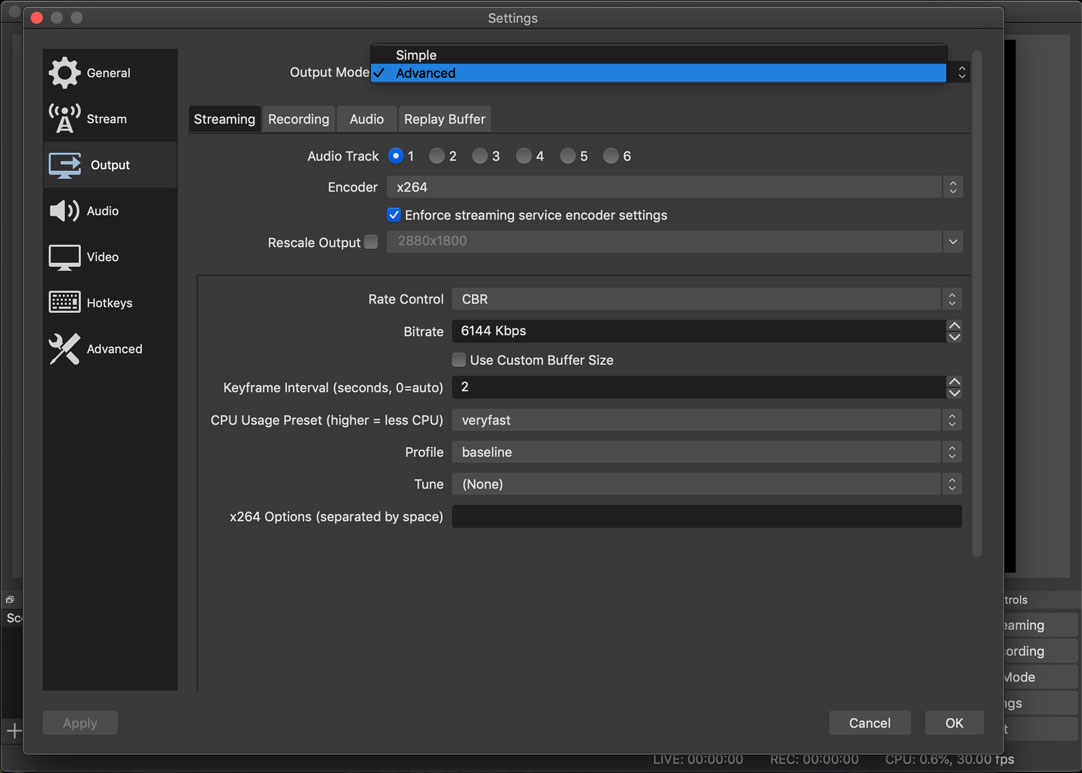
OBS output encoding settings (pleine taille)
Next, go to the output settings. Choose «Advanced» as Output Mode, and set the following values in the «streaming» tab:
- Audio Track: 1
- Encoder: x264 (software)
- Rescale Output: disabled
- Rate Control: CBR
- Bitrate: 6144 Kbps
- Keyframe Interval: 2 seconds
- CPU Usage Preset: veryfast
- Profile: baseline
- Tune: none
- x264 Options: leave the field empty
Software encoding gives far better quality than hardware encoding at low bitrates (lower than 15-20 Mbps). If you suffer from crippling performance issues during recording, you may try hardware encoding. Please provide a demo before doing so, as we may request a higher bitrate.
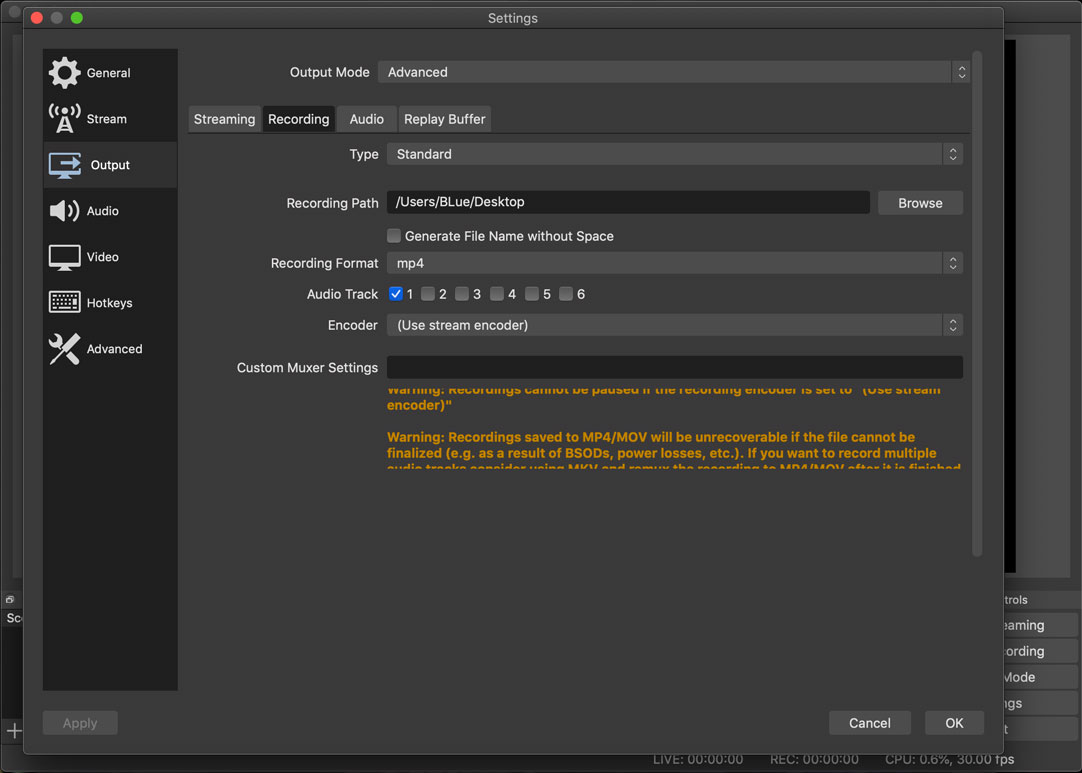
OBS output recording settings (pleine taille)
Still in the output settings, go to the Recording tab and set the following values:
- Type: Standard
- Recording Path: pick an output folder
- Recording Format: mp4 (if not available, choose mkv or flv; never pick other formats)
- Audio Track: tick only audio track #1
- Encoder: use stream encoder (this will use the settings from the other tab)
Leave the rest empty or as-is.
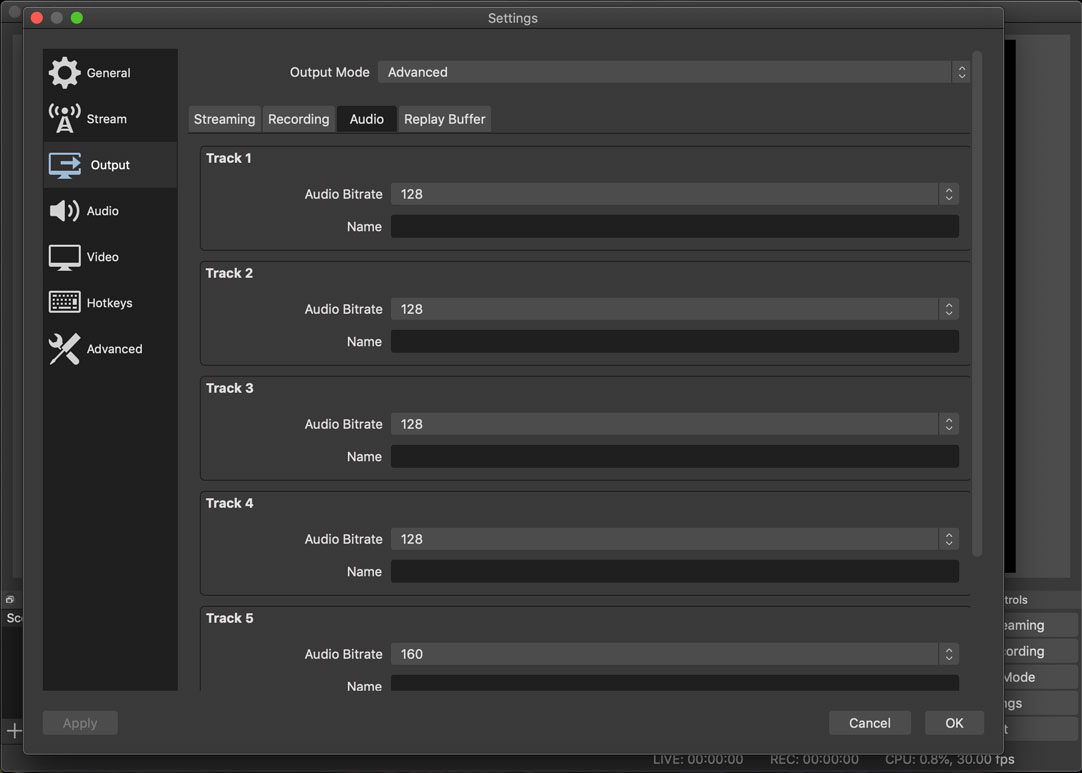
OBS output audio settings (pleine taille)
Finally, in the Audio tab, set the audio track 1 bitrate to 128 Kbps.
We are now done with the general settings.
Audio capture
We will now focus on getting audio capture working.
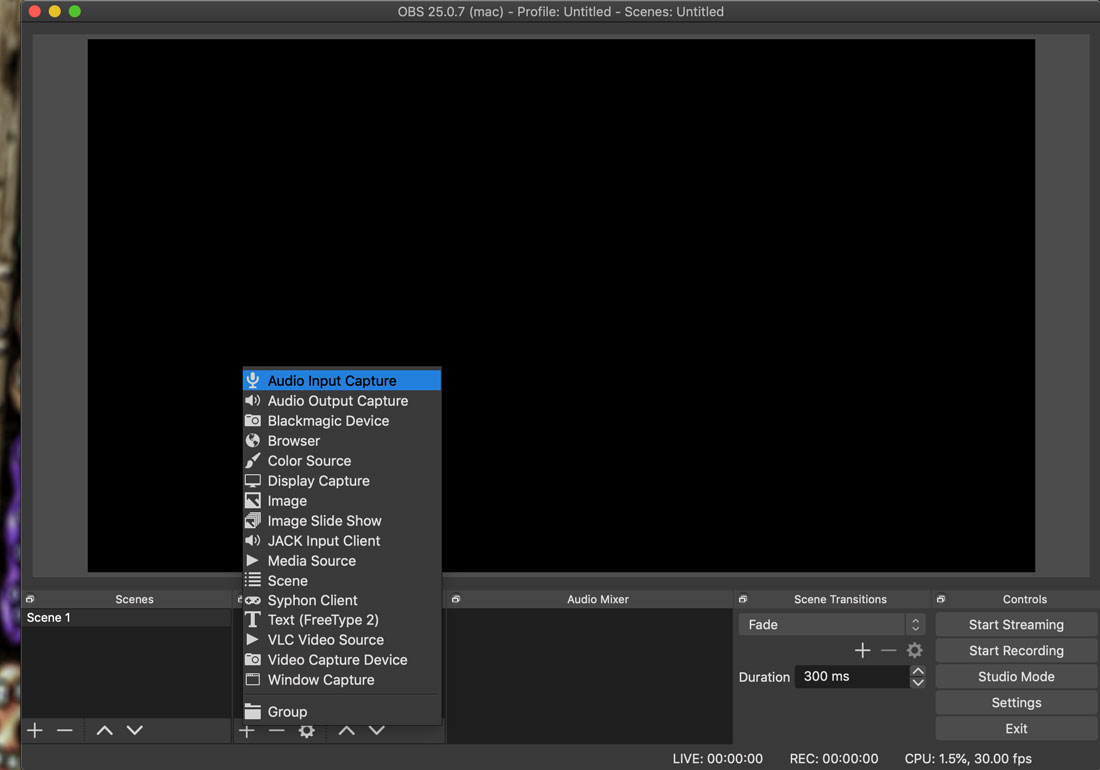
Adding an Audio Input Source (pleine taille)
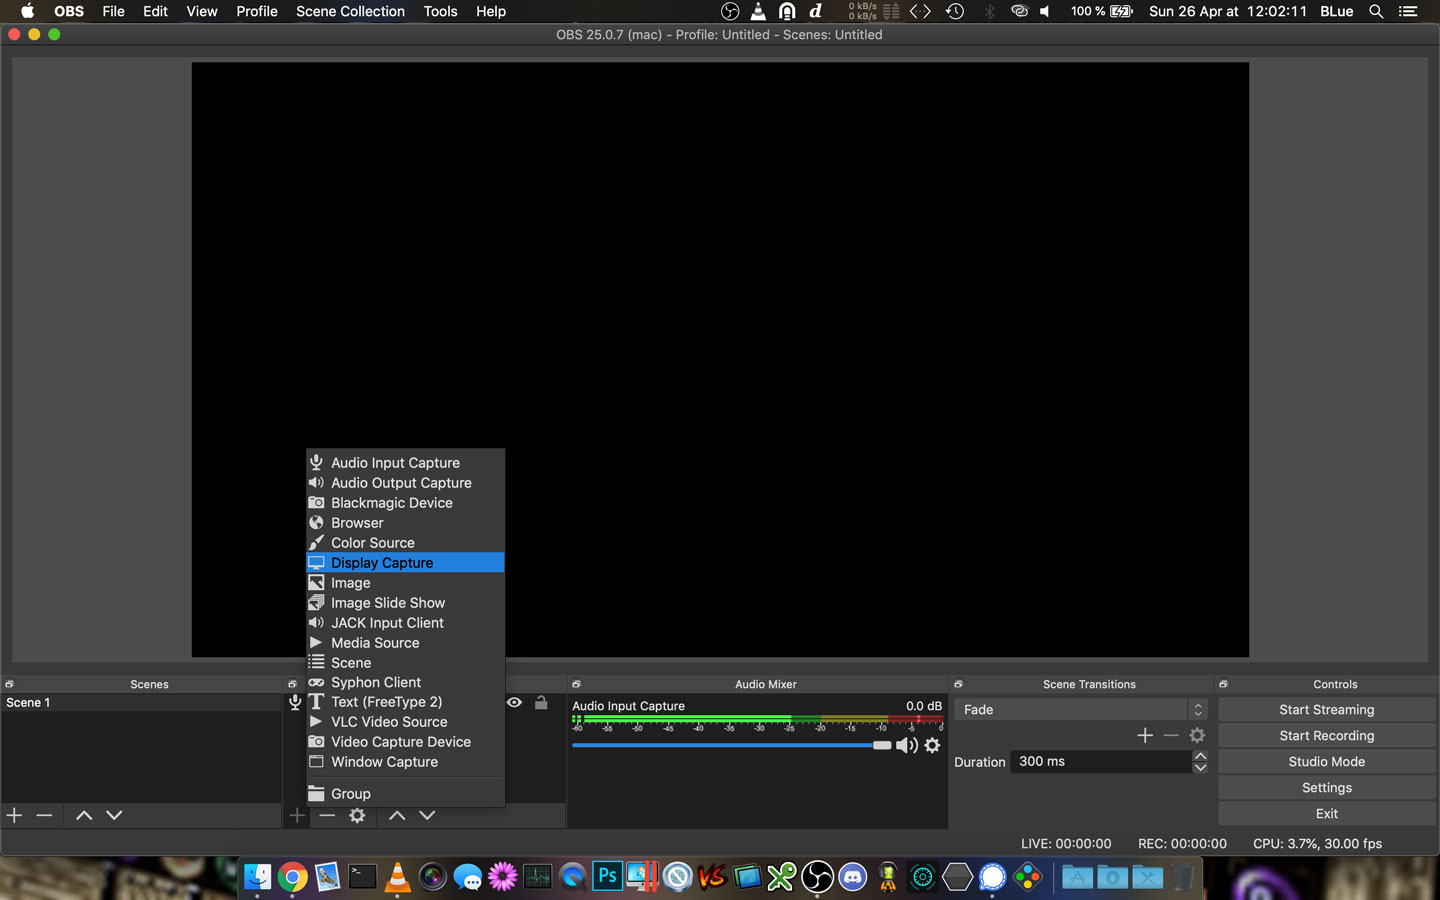
Click the «+» button from the Sources section, and select Audio Input Capture.
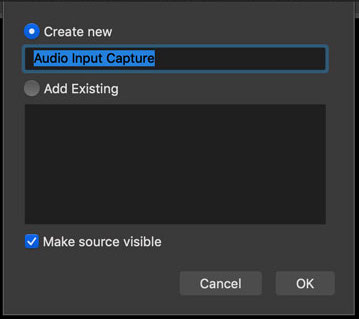
Confirmation dialog (pleine taille)
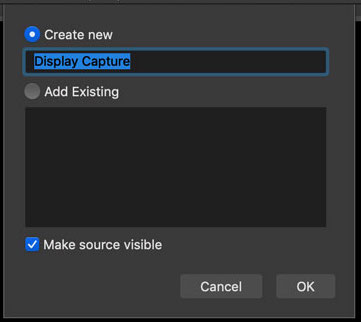
Confirm the creation.
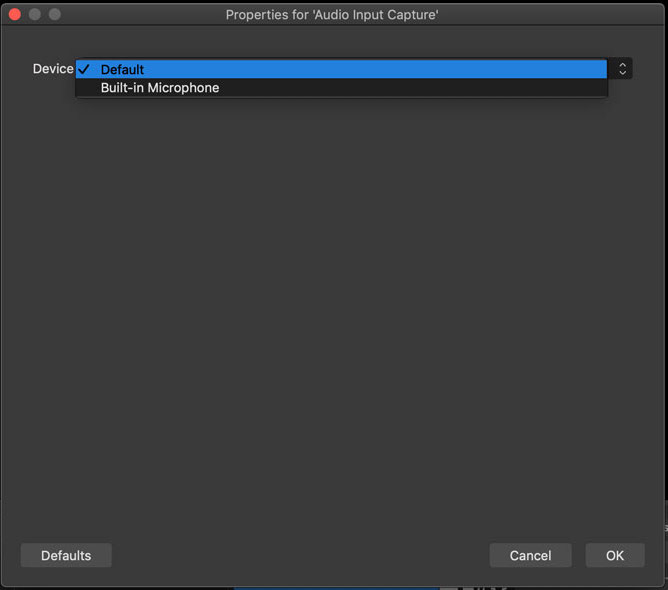
Audio source properties dialog (pleine taille)
The audio input properties will automatically open. Select your input device if needed.

Advanced audio input settings (pleine taille)
In the Audio Mixer section, a VU meter should now appear. Test if it picks up your microphone, and adjust the volume with the slinding bar.
Remember: when talking, the VU meter should NEVER go past the yellow level. Peak levels will stick to the VU meter for a few seconds, so you can check if that happens. Ideally, your voice level should average around -25 dB and -15 dB, peaking around -8 dB (right at the lower end of the red zone).
Click the settings icon of the VU meter to go to the Advanced Audio Properties:
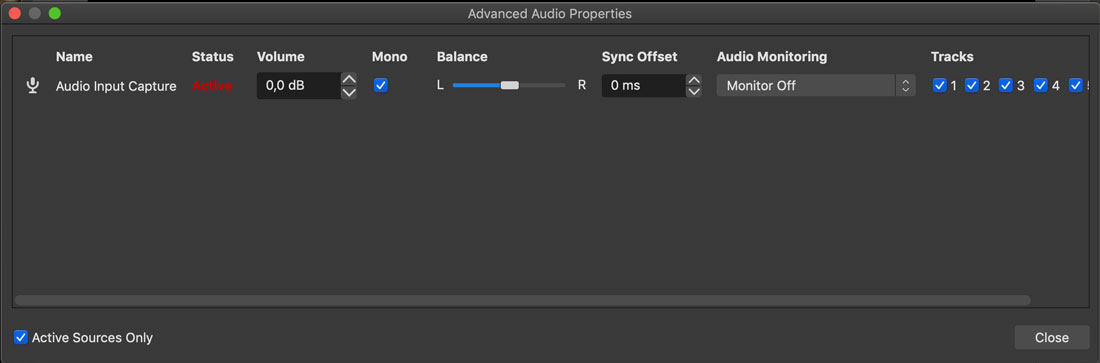
Advanced audio input settings (pleine taille)
There, make sure the volume is set to 0 dB (the is actually a volume gain control, to amplify input). Tick Mono, to ensure mono to stereo downmix, in case your microphone only outputs a single channel. Finally, tick at least track #1 and set the Audio Monitoring to «Monitor Off» (otherwise you will hear yourself through the selected device, which will lead to Larsen feedback if picked up by your microphone).
Desktop capture
Finally, we will add your desktop video capture.
Adding a Display Capture Source (pleine taille)
Add a new Display Capture source, or Screen Capture (XSHM) depending on your operating system (you should only see one or the other).
Confirmation dialog (pleine taille)
Confirm the source creation.
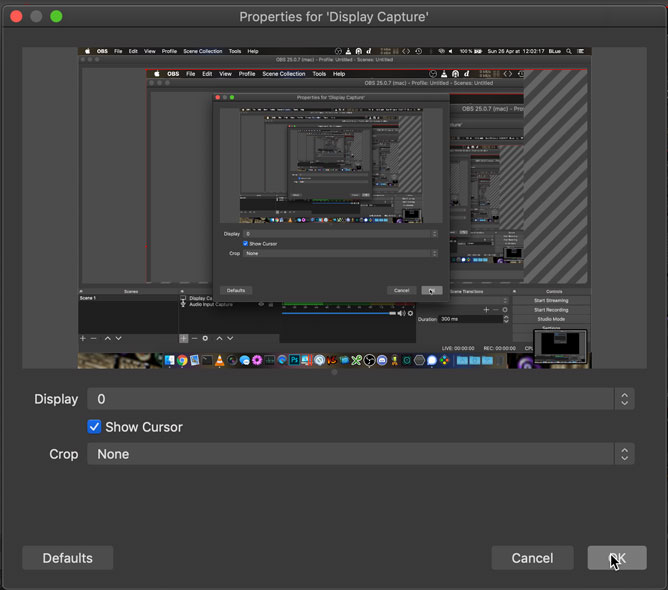
Display capture properties (pleine taille)
If you have multiple displays, select the correct display on the Properties dialog. Show your cursor (useful during demos), and do not crop the video.
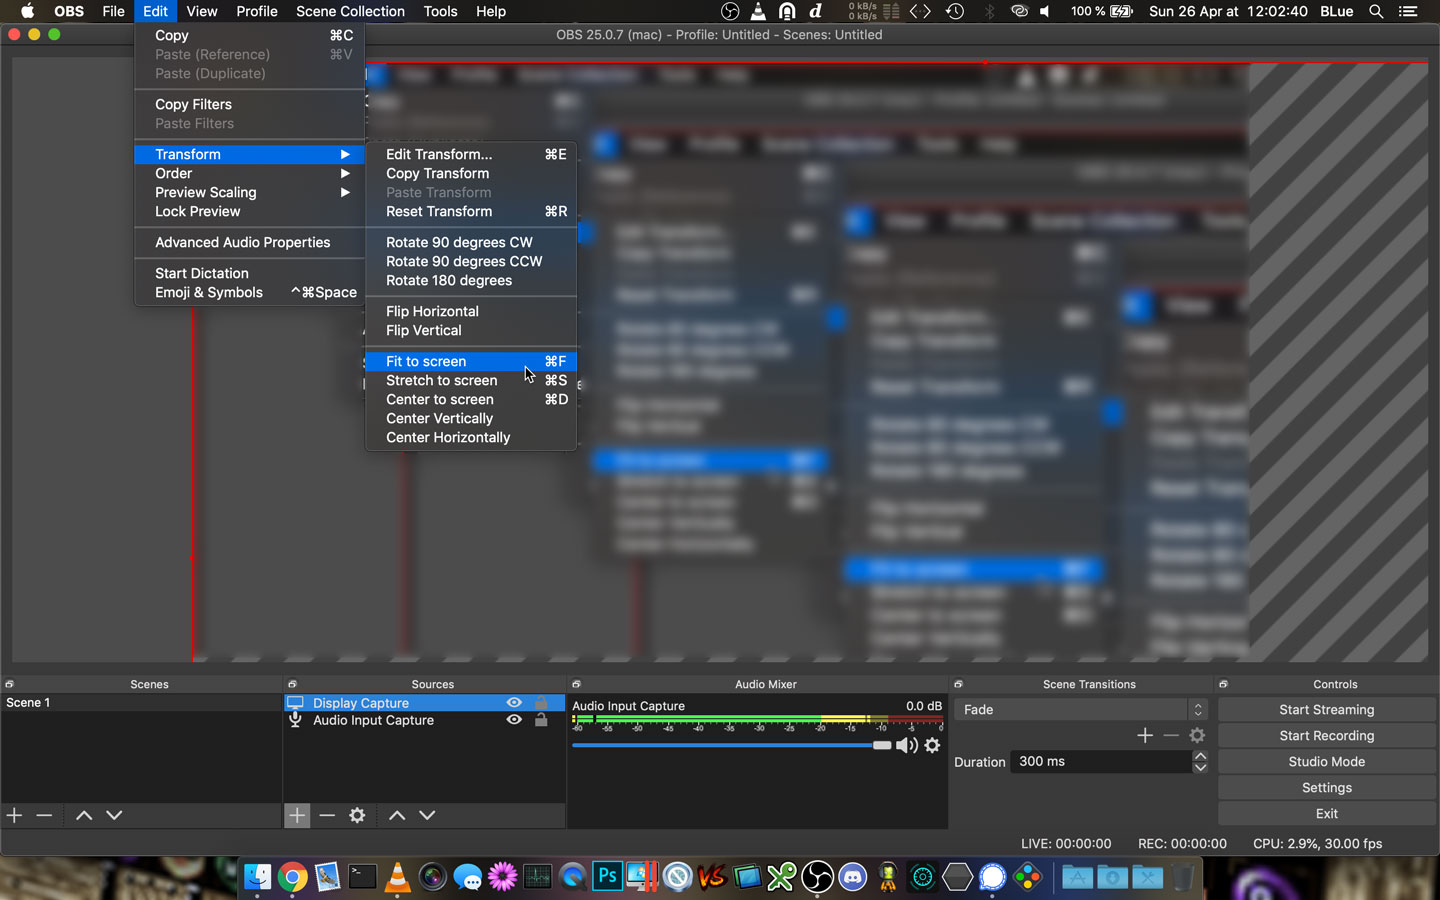
Transform menu to fit a source to the canvas (pleine taille)
Next, to perfectly adjust and center your desktop to the canvas, go to Edit > Transform and select Fit to screen. The image above is only blurred to prevent distraction from the preview feedback.
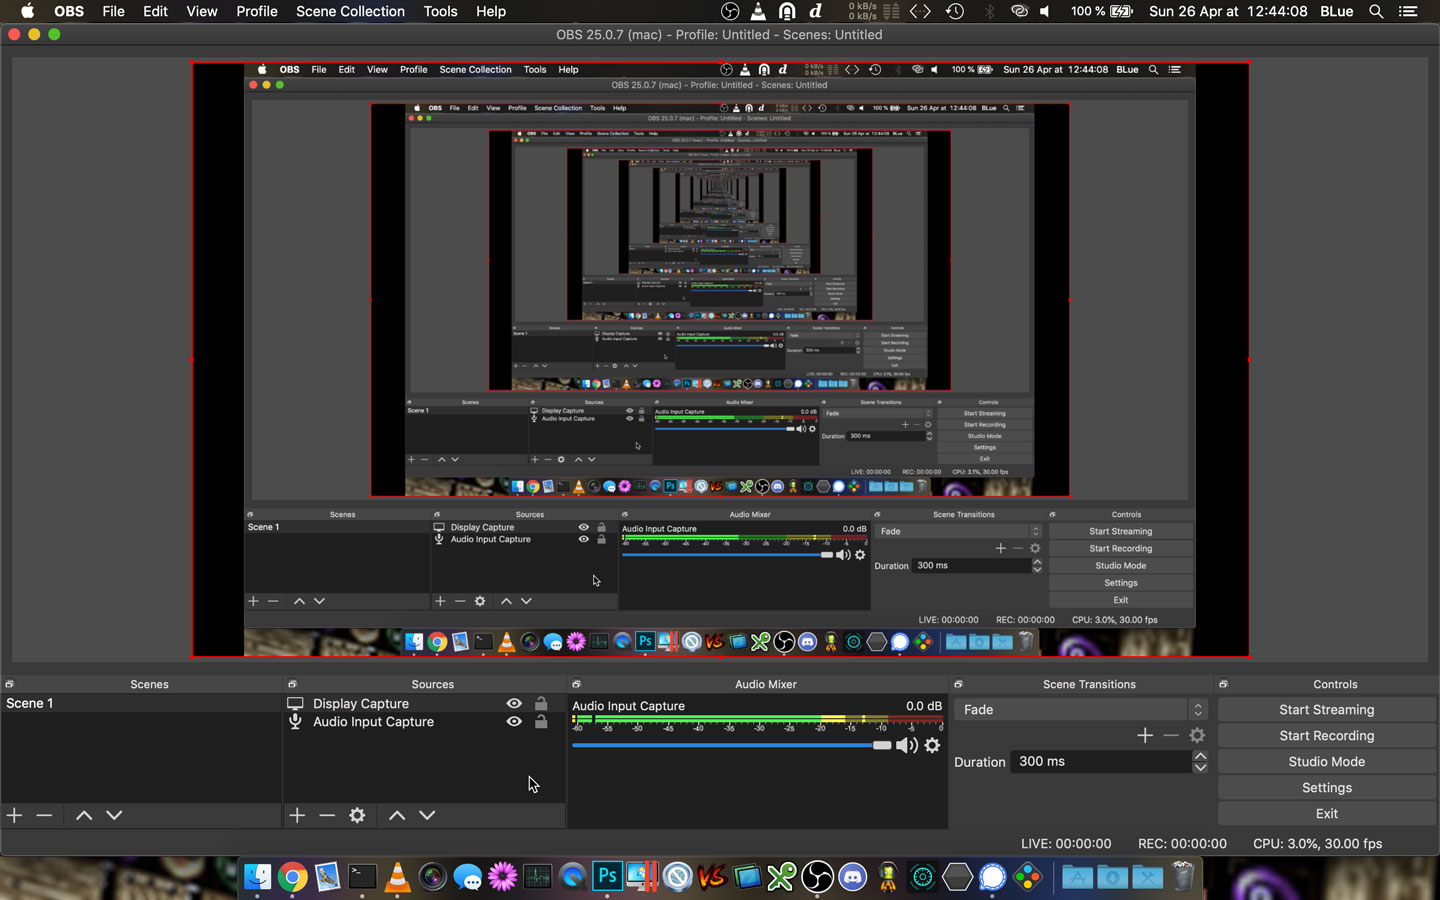
OBS main window (pleine taille)
You should now have a perfectly centered desktop capture, as shown above. Note that the display above has a 16/10 aspect ratio and results in black bars on the sides.
Always have the desktop capture fill the maximum width and/or height possible.
Optional: webcam capture
If you want to show your face, you may include your webcam as well.
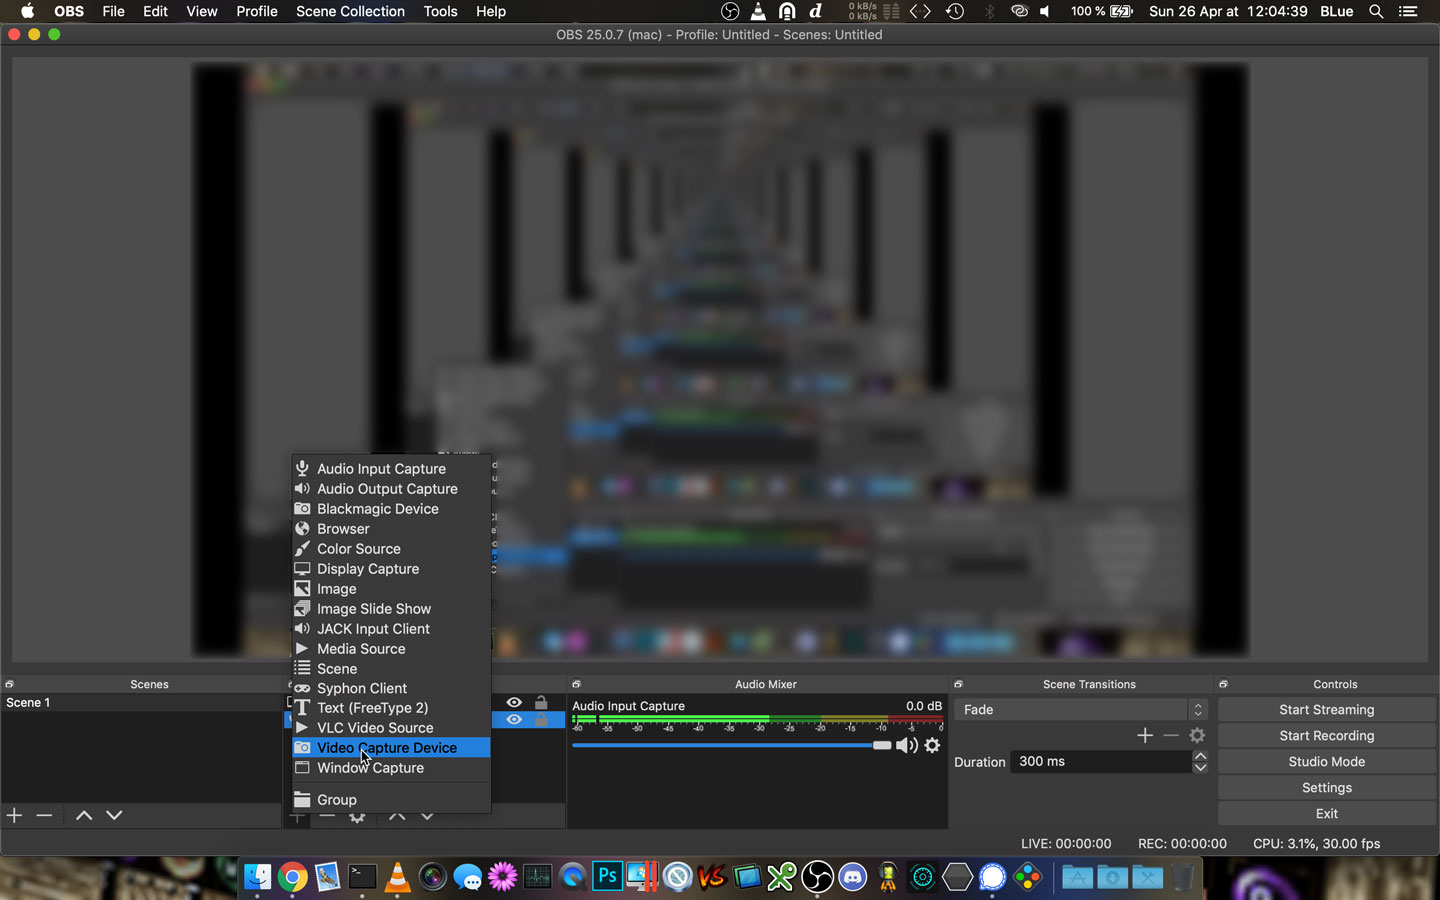
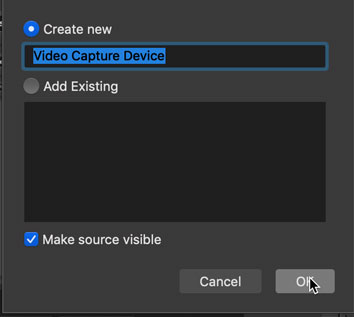
Adding a Video Capture Device (pleine taille)
Add a Video Capture Device source.
Confirmation dialog (pleine taille)
Confirm the source creation.
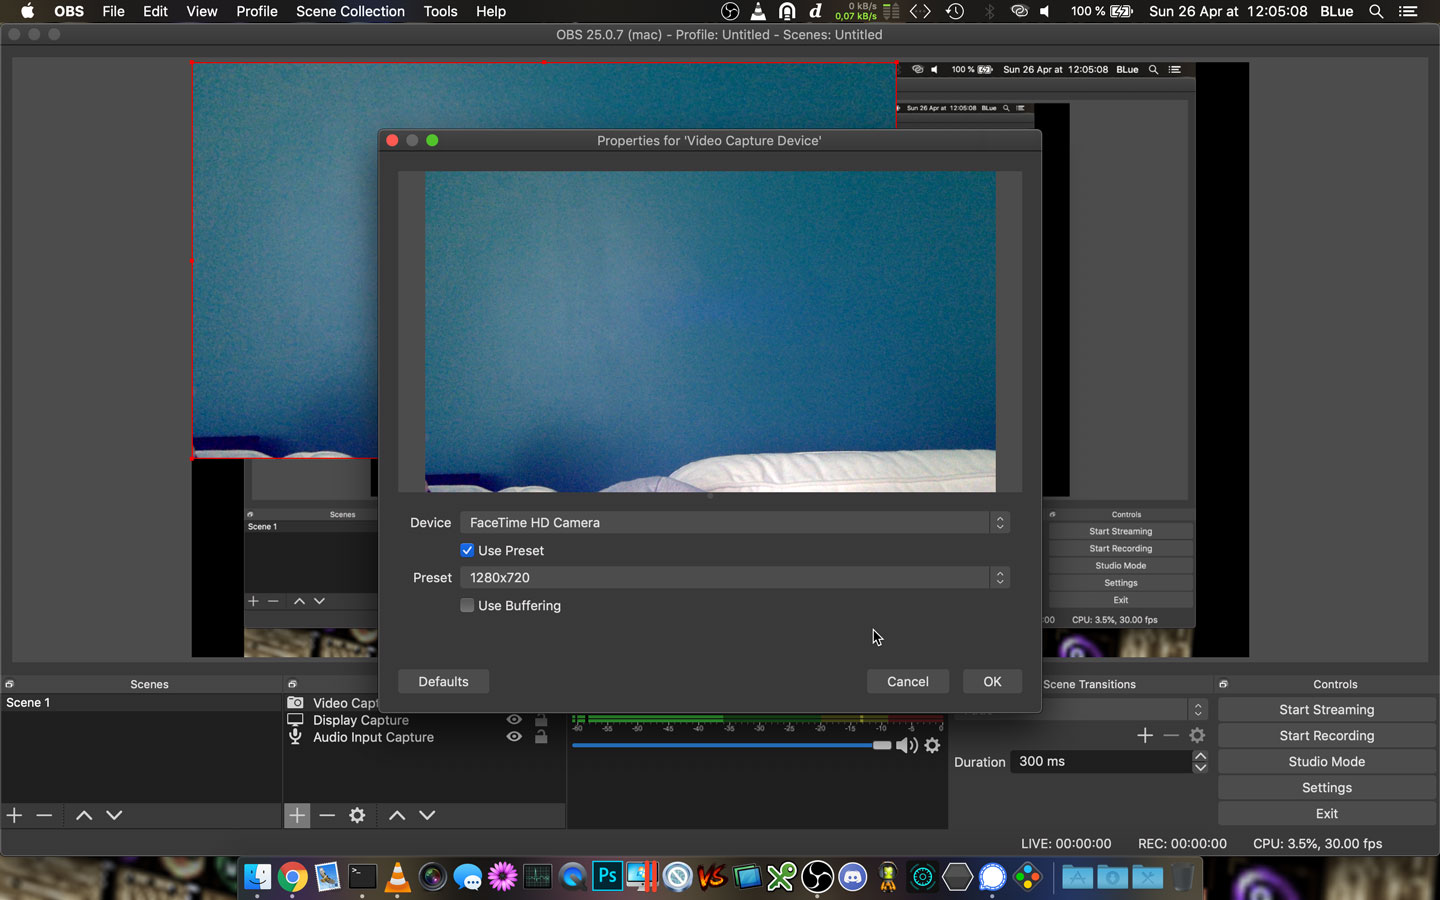
Video capture properties (pleine taille)
Select the webcam in the Properties dialog. Do not use buffering.
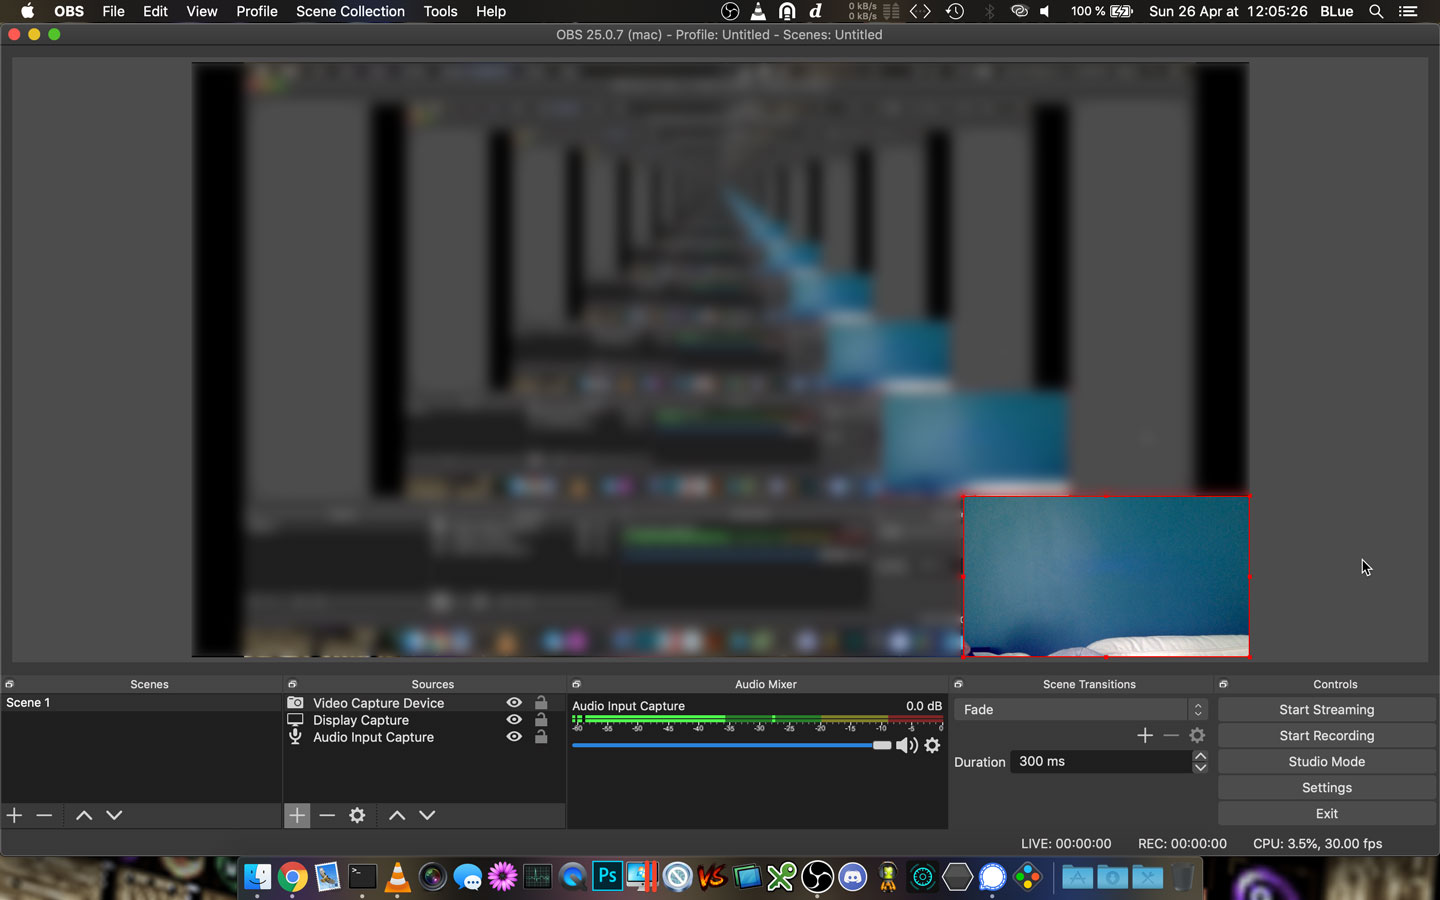
OBS main windows (pleine taille)
Resize and place the webcam in the bottom-right corner. Do not put it in the other corners, which are more likely to have content (slide headings or text content).
If you have 5/4 aspect ratio slides or display, you may shift your slides to the left and have the webcam not overlap. We do prefer 16/9 slides however.
The webcam width and height should not exceed ¼th of the canvas width and height.
Optional: audio noise filtering
If your audio recording exhibits noise parasites (laptop fan noise, background traffic…), you may try adding a noise suppresion filter.
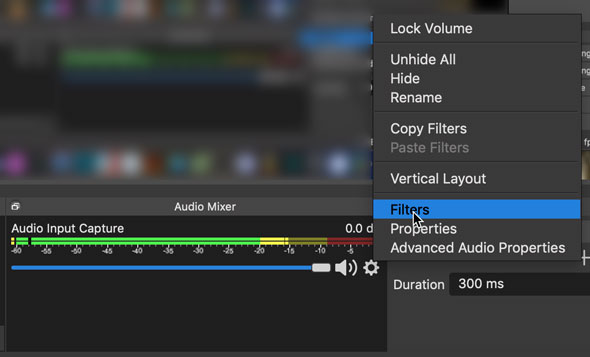
Adding audio filters (pleine taille)
Click the settings icon near your microphone’s VU meter, and select Filters.
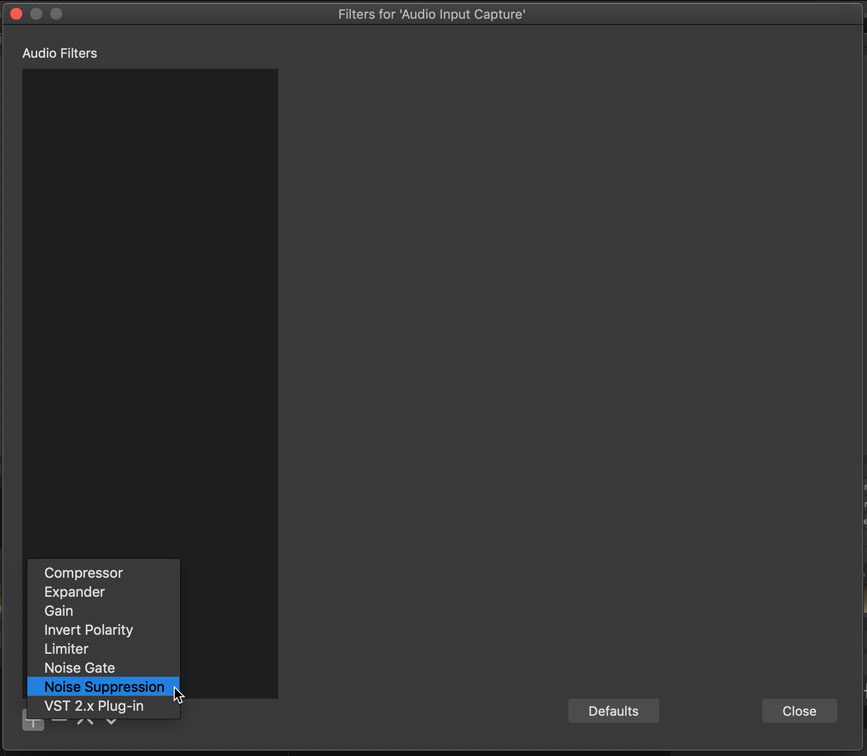
Audio filter list (pleine taille)
Add a Noise Suppression filter.

Noise suppression settings (pleine taille)
Adjust the threshold to best suppress noise without altering your own voice.
Talk guidelines
Finally, please follow these guidelines during your talk:
- close all unnecessary programs
- disable all pop-up notifications and alike
- ideally, disconnect from your Internet-facing network, so that external disturbances will not trigger (messages, updates…)
- use headphones to prevent audio feedback
- use an external microphone (like the one on your headphones) for better audio quality
- keep the input volume as low as possible and your microphone as close as possible to your mouth: this will help greatly reduce background noise and reverb as your microphone will not pick these up as easily. Do this in a way that does not require you touching the microphone while giving your talk
- if showing your webcam, have your face brightly lit, have the background properly lit but not overexposed or brighter than your face, and beware of what shows around you. Preferably, use a plain, solid-color background like a plain wall.
When you are ready to proceed with recording your talk:
- start the recording in OBS studio
- revert your screen back to your slides
- wait 10 seconds and go ahead!
- at the end, wait 10 seconds before switching back to OBS then stop the recording.
These 10 dead seconds will help us cut your fiddlings with OBS cleanly.
If you are satisfied with yourself, send us the video file.